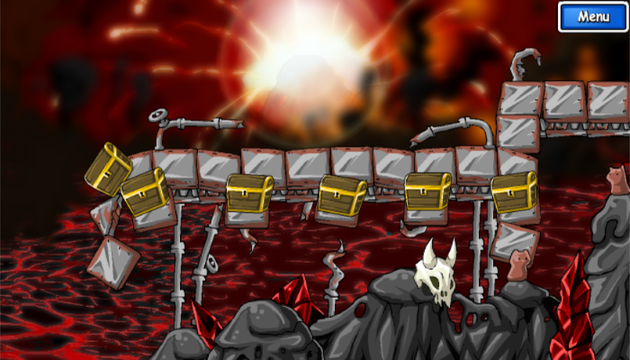
Epic Battle Fantasy 3 Map/E1 60 Medals Area
| Exits | World Map | Index |
|---|---|---|
| None | ||
| None | E2 Volcano Peak | |
| None |
| Treasures | |||
|---|---|---|---|
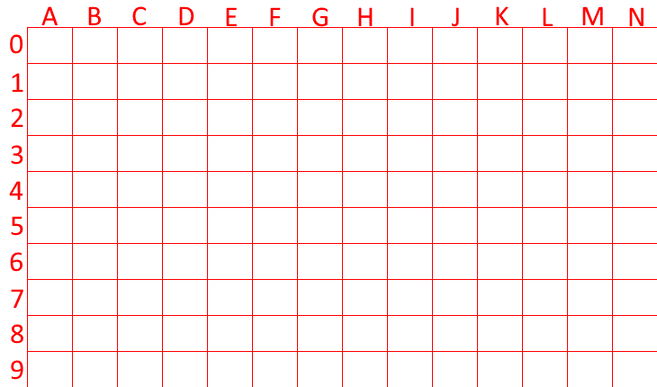
| C 4 | 5 Gummy Bear | 5 Lollipop | 30 Yoghurt |
| D 5 | 30 Choco Cornet | 30 Bacon | 30 Beef |
| F 5 | 5 Diamond | 5 Titanium | 5 Mercury |
| H 5 | 5 Darkmatter | 30 Cake | 30 Chocolate |
| J 5 | 100,000 Gold | 20 Gold Plate | 5 Mythril Plate |
| L 5 | 10 Amethyst | 10 Ruby | 10 Emerald |
| Foes | 1st Wave | 2nd Wave | 3rd Wave |
|---|---|---|---|
| L 2 | 1 Light Golem, 1 Dark Golem | 1 Red Bush, 1 Dark Bush | 1 Ice Elemental, 1 Fire Elemental, 1 Earth Elemental |
| L 4 | 1 Evil Worm, 1 Evil Tail | 2 Evil Worm, 2 Evil Tail | |
| J 4 | 1 Dark Bush | 1 Ancient Monolith, 1 Cosmic Monolith, 1 Viking Monolith |
Strategy
The 60 Medals Area, as its name suggests, cannot be entered until all the Medals in the game have been acquired. The three battles here can be skipped (by fleeing immediately when the battle is triggered), but present a great challenge to those who want to truly finish the game, especially at Level 30.
Note that these strategies only apply on Epic at level 30. Lower difficulty or breaking the level cap will make these fights a lot easier, although they might still catch you off-guard.
Battle 1: Golems, Bushes, and Elementals
The first battle (at the first corner of the path) consists of 3 waves: a Light and Dark Golem, a Red and Dark Bush, and then an Ice, Fire, and Earth Elemental. The Golems are tough but manageable if fully buffed; their attacks have only moderately high power, even though they're both at Level 36. The two Bushes, on the other hand, are extremely powerful; at a whopping Level 50, they are all but guaranteed to kill their targets in one shot. Stun them immediately using a Stunner and then take the fight at your pace. They have a lot of health and Evade due to the level gap, so it may take a while to kill them; applying Poison can help speed up the process.
The last wave features the Elemental family, all at Level 36. They're able to deal massive damage with their multi-hitting attacks, but the Fire Elemental can inadvertently assist the player if it decides to use its Hot Ash attack. Since neither of the other Elementals absorb Fire, they'll take significant damage from Hot Ash; the Fire-weak Ice Elemental will likely be killed outright, while the Fire-resistant Earth Elemental will lose a good chunk of HP.
It's worth noting that aside from the Golems (with their 50% resistance), none of the enemies in this battle have any resistance to Instant Death. Utilizing the Death Bringer's Unleash can quickly take out most of the enemies, as can Annihilate; make sure to use Accuracy buffs and Evade debuffs to increase the chances of them finding their marks, especially against the Bushes.
Battle 2: Revenge of the Worms
Two spaces down from the first battle (right in front of the first chest), the party will be ambushed by two waves of Evil Worms and Evil Tails. They might not have Akron backing them up, but they're not to be underestimated, especially since they're all Level 38.
The first wave has one Tail and one Worm, but even this can be quite challenging. Having a high Evade stat helps against the Evil Tail and the first third of the Evil Worm's health; once it gets past that point, it makes liberal use of its accurate Burp attacks. Berserking either foe limits their options, but will still have them dealing more than enough damage to take down a player from full health, even with a high Defence buff.
The second wave consists of 2 Tails and 2 Worms, making things even more hectic. Don't hesitate to use your Limit Breaks here, since this wave is extremely hard without using them; Kyun is particularly useful thanks to halving the stats of all foes. Go all out, and try to finish off at least one of the Worms in the first round to make this wave just a bit more manageable. Annihilate can be used here as well, as it has a 60% chance to inflict Instant Death on each Tail and Worm; getting at least two down will make the wave a lot easier. Another strategy is using Stunners with the Pilot Goggles, as they have around a 50% chance to inflict a 4-turn Stun, which will help immensely if it lands.
Battle 3: Mega Monolith Melee
The third and final battle is set in front of the second chest. It has two waves, but the first is almost laughably simple: a single Dark Bush with the "honor" of being the only enemy in the area at the normal level cap (30). It shouldn't be a problem for your party - especially if they made it through the last two battles - but make sure to set up all of your buffs (particularly Auto-Revive, Regen, and Magic Defence buffs) before you kill it...
...because the second wave may well be the single most terrifying sight in all of Epic Battle Fantasy 3: a whole family of Monoliths, all at Level 40. Hopefully, you've already switched the party's equipment to give everyone Dark immunity; this will greatly mitigate the threat of the Cosmic Monolith. Any combination of Dark-resistant gear works, but the arguably optimal setup is as follows:
- Matt should use the Rune Blade, the Officer's Coat, and the Officer's Hat; this actually lets him heal slightly from pure Dark damage, and his naturally high Attack gives his hat and armor's auto-skills a bit more punch against the Bomb-weak Monoliths.
- Lance can gain Dark immunity by using the Shadow Blaster and the Ninja Cloak; the latter works better on him than Matt due to slightly better Evade and his access to Airstrike. Since there's no other Dark-resistant headgear, he can opt for the Ninja Hood to emphasize his agility, the Fuzzy Hat to blunt the Viking Monolith's attacks, or the Soldier Helmet to patch up his defenses and drop the occasional Medipack between turns.
- Natalie has the widest range of Dark-resistant gear to choose from: using the Obsidian, the Pope Hat, and either the Pope Dress or the Ninja Skirt will give her a whopping 150% Dark resistance to outright benefit from the Cosmic Monolith's Dark skills. The Pope Dress is preferred over the Ninja Skirt for its superior bulk and auto-Magic Defence buff, but the added Accuracy and Evade from the Ninja Skirt can be worth consideration to counter the Monoliths' level advantage somewhat. If you don't mind losing the Dark absorption, Natalie can use one different piece of equipment: the Nurse Hat powers up Healmore, the Ice Shards or Viking Dress help endure the Viking Monolith's Ice attacks and the Cat Costume provides additional (if unreliable) item support with its NoLegs auto-skill.
With Dark resistance out of the way, your immediate priority should be to Syphon the Ancient Monolith. If you don't, the first enemy turn is almost impossible to survive; the Ancient Monolith's beam attack is liable to Dispel the party's buffs, leaving them wide open for the Cosmic Monolith's Flare to pick off the rest of their HP. If they somehow survive that and the subsequent Doomsday, the Viking Monolith will certainly finish the job with its Blue Beam, with a high risk of Freeze to anyone lucky enough to endure. By disabling the Ancient Monolith, your party is much more likely to make it through the first turn; they'll still probably die to the Viking Monolith, but Auto-Revive will bring them back and Regen will help patch them up.
Once you survive the first turn, your next objectives should be to Syphon the Viking Monolith and Berserk the Cosmic Monolith. The latter's powered-up Doomsday spam will do massive damage to its allies while the party is kept relatively safe with their Dark-resistant setups; still, be prepared to do a lot of healing and reviving until the Ancient and Viking Monoliths fall. Once the Cosmic Monolith is alone, you can Syphon it to uselessness and then finish it off; be prepared for a long fight, as its HP and Evade stats are enormous.
If you manage to win this battle, give yourself a pat on the back, claim your pointless rewards (unless you like stat maxing and the like), and know that you have overcome the deadliest challenges that Epic Battle Fantasy 3 has to offer!


